


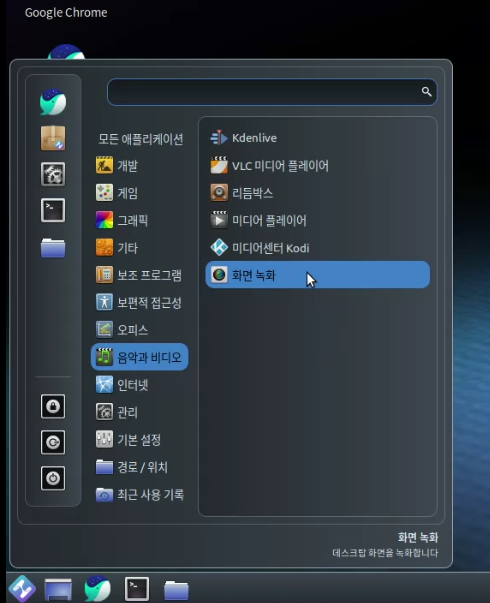
좌측 하단 '메뉴 > 음악과 비디오 > 화면 녹화' 실행
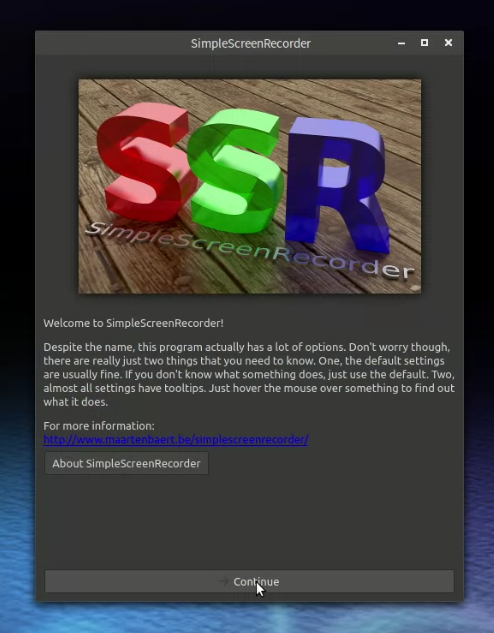
하단 Continue 클릭
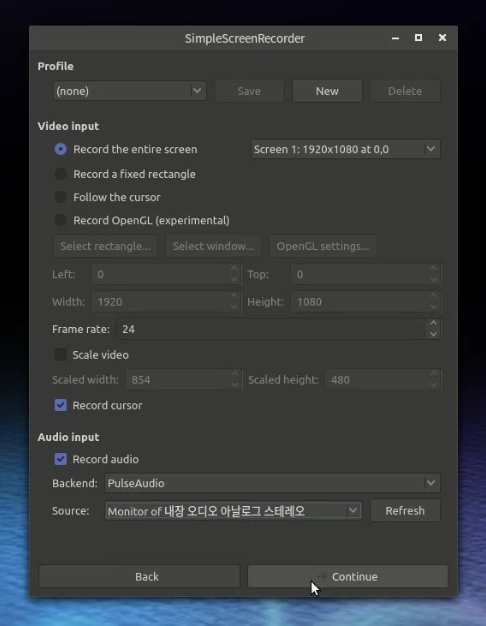
Video input 메뉴에서 녹화할 화면을 설정합니다.
Audio input 메뉴에서 오디오 설정을 합니다.
Frame rate 는 18 ~ 24 로 설정할 것을 권장 드립니다. Frame rate는 낮으면 화면이 끊어져 보이고 높으면 용량이 커집니다.
설정이 완료되면 하단의 Continue 버튼을 클릭합니다.
설정이 완료되면 하단의 Continue 버튼을 클릭합니다.
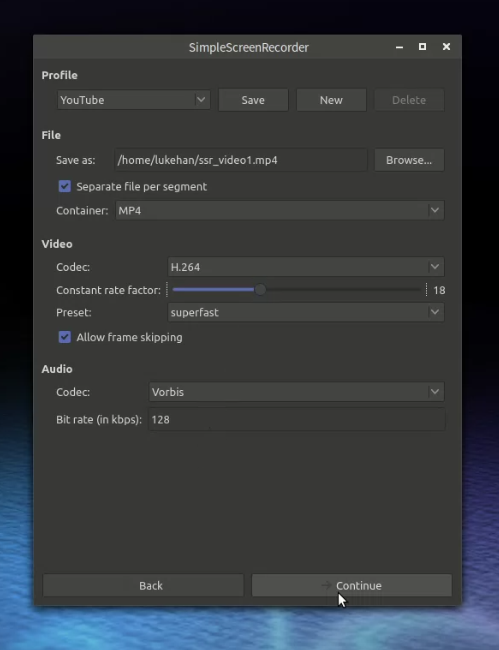
상단의 Profile 메뉴 에서 프로파일을 설정합니다.
File 메뉴에서 저장할 파일 경로 및 파일명을 설정할 수 있습니다.
Video 및 Audio 메뉴에서 Codec 을 선택합니다.
설정이 완료되면 하단의 Continue 버튼을 클릭합니다.
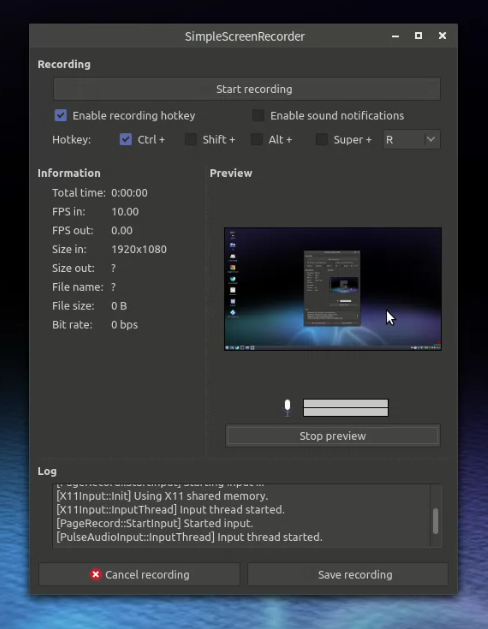
중앙의 preview 버튼을 클릭하여 영상 녹화시 preview를 확인합니다.
상단 Recording 메뉴의 Start recoding 버튼을 클릭하여 녹화를 시작합니다.
녹화가 완료되면 하단의 Save recoding 을 클릭하여 저장합니다.
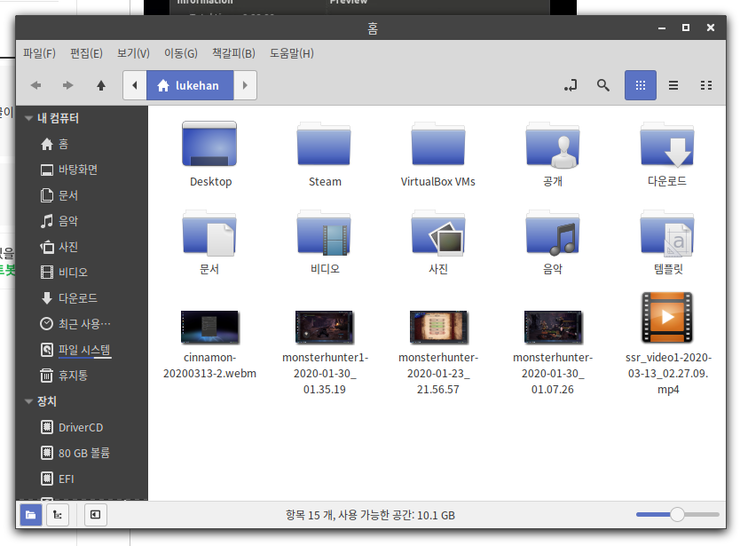
설정한 경로에서 저장된 영상을 확인할 수 있습니다.
출처 : SSR 프로그램으로 화면 녹화하기

 하모니카에서 블루투스 사용하기